The Accessibility for Ontarians with Disabilities Act (AODA), 2005 requires that website content is made available to everyone regardless of their disability.
Accessible content is legally required under the AODA (more information on website accessibility).
An accessibility checker has been added to the Body - Tool Bar (CK Editor) so site editors can review accessibility errors and make corrections to content where necessary.
How to Use the Check Accessibility tool
View Quick Video on How to Use the Check Accessibility Tool
The Check Accessibility icon is located in the top left corner of the toolbar.
![]()
The Check Accessibility tool works inside the editing interface on one page at a time. You must be logged in and on an Edit Page.
Select the Check Accessibility icon - ![]()
When the checker finds issues in the body copy, it will display a panel containing the tools needed for understanding and solving the problem.
Accessibility problems are presented one issue at a time.
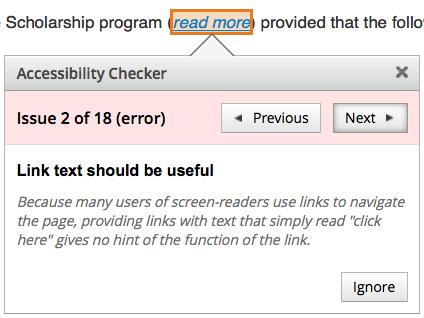
The error will be highlighted directly on your content and the panel will have an error message that explains the error in further detail.

For the error shown above the text "read more" has been highlighted on the page and the error message explains that link text should be useful to the user.
Using the Previous and Next buttons you can move through the errors on your page. Note that the example panel above is showing Issue 2 of a total of 18 errors on the page.
What Exactly Are Issues?
An issue represents a single accessibility problem in your content. Issues are grouped into different types:
Error – The checker is 100% certain that the highlighted element contains an accessibility issue.
Warning – The checker discovered that there is a possibility of a given error, but it does not have a 100% certainty.
Notice – The checker has no way to detect this issue, so it points to an issue only as a notice and the user can verify if the content satisfies the given rule.
In checking mode the highlight color will differ slightly (ranging from red for an error through yellow for a warning to grey for a notice) in order to differentiate the issue type.
Fixing Issues
Fixing the issues noted is not always a simple matter. In the example above the editor would need to manually change the body copy so that the link text is more explanatory.
However, for other types of errors, a "quick fix" may show up directly in the issue panel.

In the example above the graphic on the page has been highlighted and the message in the panel explains that the alternative text for the image is missing.
In this case, there is a "quick fix" available. You can add the alt text (Camello Doctor Family Music Heritage Bursary, deadline May 1, 2018) directly in the issue panel rather than returning to the body copy and adding it manually in image properties.
What will the tool flag?
Editors can expect the accessibility checker to flag, among others:
- missing alt tags on images
- regular text improperly set as a header
- headers not properly set
- headers used out of order
- poorly worded link text
- adjacent duplicate links
- use of HTML tables
- text justification issues
The tool will not flag colour contrast issues, broken links or violations of university web policies and guidelines.
This accessibility tool is designed to be an aid to campus editors but it does not take the place of a full AODA audit.
The accessibility tool checks only the body copy of your page. It is not checking other elements like menus, blocks or header images.
Important Note
The accessibility checker has a known issue that IT programmers are addressing.
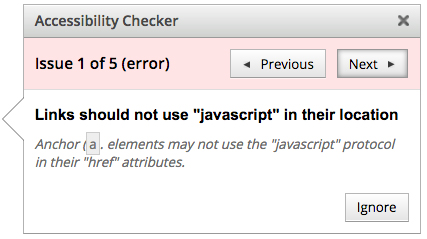
If you use a Bootstrap Collapse (accordion sections) on your page the checker will flag an error. The error relates to javascript programming and is not fixable by an editor. You can ignore this error.
The issue panel for the known error is shown below:

