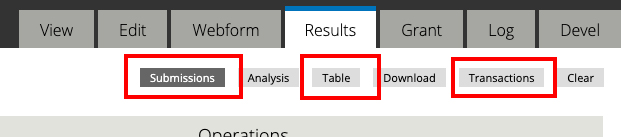
Viewing Submissions
To view all the submissions, log into the website, go to your web form and select the Results tab.

In Results, you can view your submissions, perform basic analysis, view in table format, download the results to Excel or look at your e-commerce transactions.
The tab "Transactions" provides the best overview of e-commerce submissions because it also shows if the payment was successful.
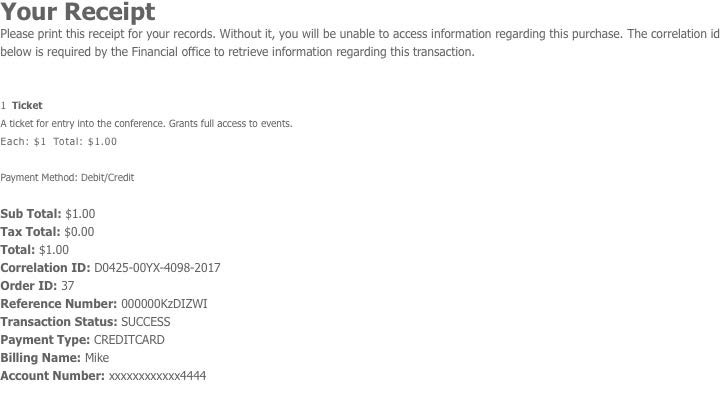
Information About Receipts
E-commerce receipts are issued after the transaction is completed in the users' browser. Emailed receipts are not possible.
Users can print the online receipt for their records or write down the correlation ID (this is used to look up transactions).
Sample receipt:
Adding Email Notifications
To access the notifications settings, go to the ‘Webform’ tab shown below. This will give you access to e-mail notification options.

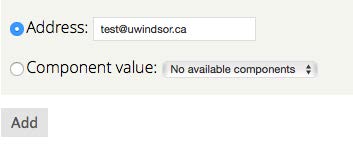
To create a notification, simply select whether the email-to is an address or a value of a component (for example, if a select option contains a list of names and emails as values).
On the next screen, fill out the settings. The following options are available to you:
- E-mail Subject
- E-mail From Address
- E-mail From Name
- E-mail Template (body)
Save the settings. Now. whenever a form submission is entered, an email notification will be sent.